gRPC & ASP.NET Core 3.1: How to create a gRPC service ?
Creating a gRPC service
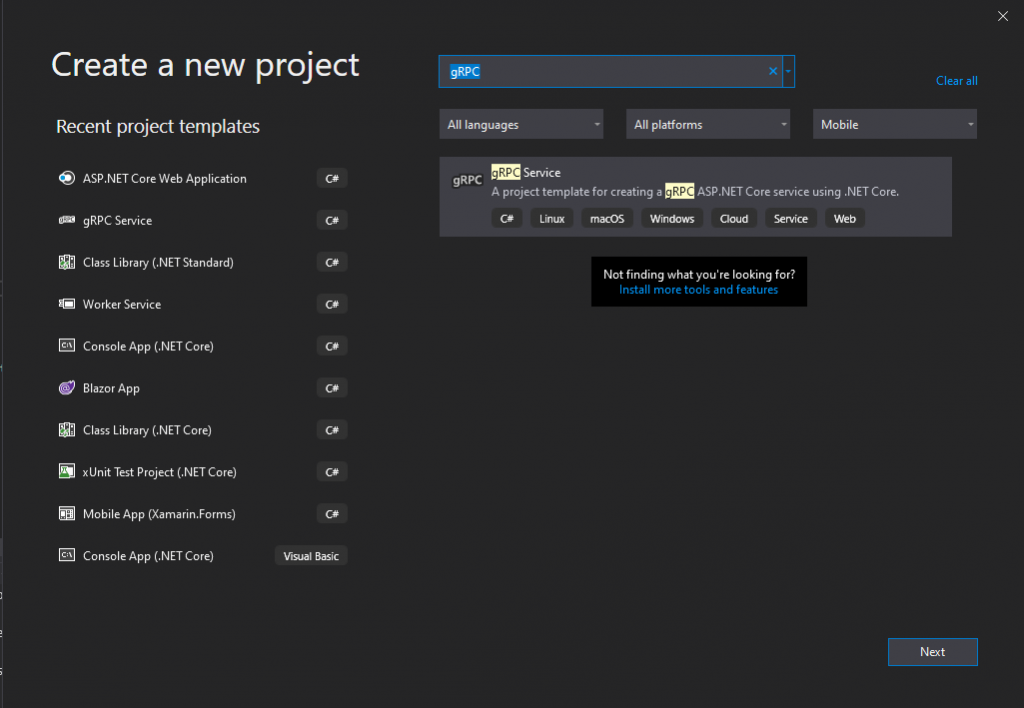
You’ll need to open Visual Studio 2019 and select “gRPC service” in “Create a new project” screen:
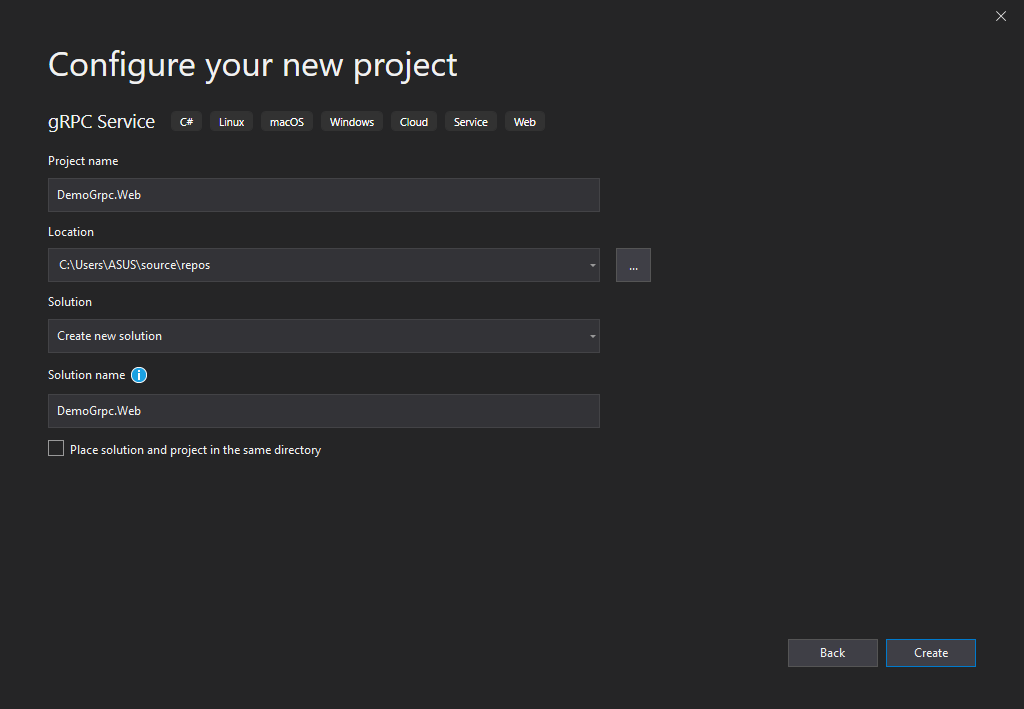
And then name your project:
Anatomy of a gRPC service
We find the usual components of an ASP.NET Core project like:
- The launchSettings
- The appsettings.json files
- The Program.cs
- The Startup.cs
In a gRPC service project we discover:
- A Services directory with a gRPC service,that contains a sample named GreeterService inheriting from a self-generated class named Greeter.GreeterBase, with its constructor and its method (s). Note that the built-in dependency injection of ASP.NET Core is available with a gRPC service.
- A Protos directory containing the Protocol Buffers, in other words the service contract.
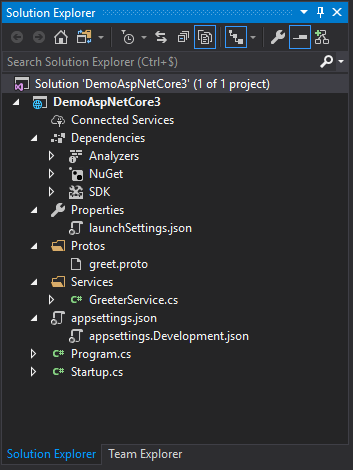
The startup.cs looks like this by default:
How does a gRPC service look like?
As mentioned above, it is above all a C# file with its service class inheriting from a self-generated class, a constructor and its service methods. Each service method takes as parameter a message type input model as defined in the .proto file and a ServerCallContext type context.
Example of a unary service method:
The .csproj looks like:
How to create a new grpc service after creating the project?
First download the Grpc.Tools package:
Install-Package Grpc.Tools -Version 2.27.0
This will allow you to generate the classes of your gRPC service defined in your Protocol Buffers files that you will create manually. These classes will be autogenerated when you build your solution in Visual Studio 2019.
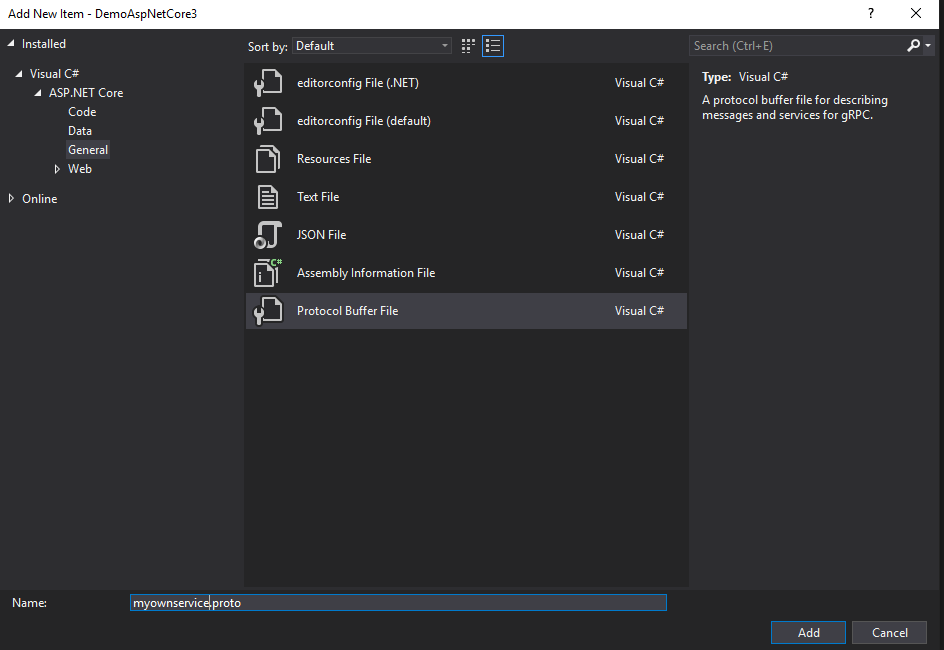
Then create a new .proto file:
You can now create your operations and contracts (message):
Once done, you need to compile your app, autogenerated classes will be available and you will be able to write your service. Behind the scene, the Protocol buffer compiler (protoc) will generate C# classes.
protoc is a compiler for protocol buffers definitions files. It can generate C++, Java, Python and many other sources code for the classes defined in a proto file.
If all goes well classes will be generated in this directory: ..\obj\Debug\netcoreapp3.1:
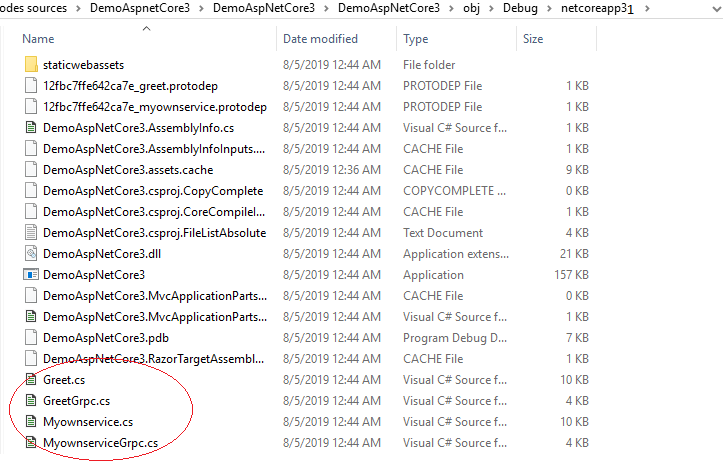
Now you are able to write your services methods:
Don’t forget to register your new service in the endpoints middleware:
Before running your service
gRPC in ASP.NET Core 3.1 requires HTTPS, so in local development, don’t forget to trust your local SSL certificate with the following command:
dotnet dev-certs https --trust
After all these steps you should be able to run your app:

gRPC & Azure App Service
gRPC in ASP.NET Core is currently not supported on Azure App Service or IIS. The HTTP/2 implementation of Http.Sys does not support the HTTP response end headers on which gRPC relies. The original announcement from Microsoft can be found here: https://docs.microsoft.com/en-us/aspnet/core/tutorials/grpc/grpc-start?view=aspnetcore-3.0&tabs=visual-studio#grpc-not-supported-on-azure-app-service
Browser support
gRPC doesn’t support browsers. The grpc-web client library for SPAs such as Angular, React etc… is not compatible because at the moment browsers do not support the level of control required on web requests to support a gRPC client. For more information, you can refer to this page here: https://docs.microsoft.com/en-us/aspnet/core/grpc/comparison?view=aspnetcore-3.0#limited-browser-support
If you still want to use grpc-web, this is still possible but you will need to use a proxy such as Envoy to transform HTTP/1 requests into HTTP/2 and vice versa:
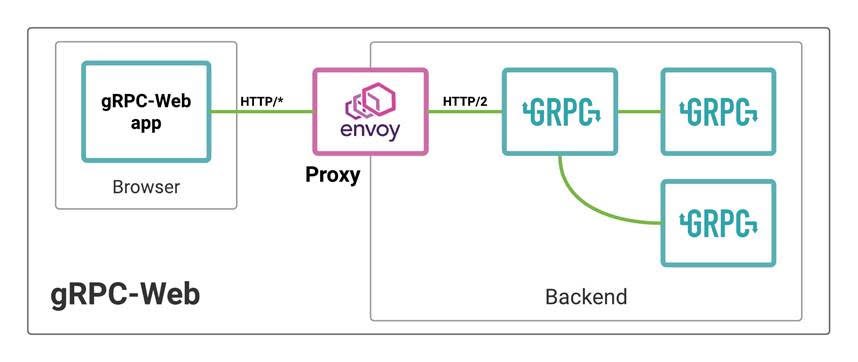
Later in this serie we will see how to use grpc-web client library in ASP.NET Core gRPC with a workaround (still in preview) implemented by Microsoft recently.
Conclusion
In this tutorial, we learned how to create a new gRPC service from a Visual Studio 2019 template, and how to create our own service and configure it.
In the next article we will see how to consume from a .NET Core 3.1 client a .NET gRPC service. See you in the next article 🙂
