Common features in ASP.NET Core 2.1 WebApi: Documenting
- Common features in ASP.NET Core 2.1 WebApi: Authenticating with a JWT
- Common features in ASP.NET Core 2.1 WebApi: Validation
- Common features in ASP.NET Core 2.1 WebApi: Error handling
- Common features in ASP.NET Core 2.1 WebApi: Logging
- Common features in ASP.NET Core 2.1 WebApi: Testing
- Common features in ASP.NET Core 2.1 WebApi: Documenting
- Common features in ASP.NET Core 2.2 WebApi: Profiling
- Common features in ASP.NET Core 2.2 WebApi: Caching
- Common features in ASP.NET Core 2.2 WebApi: Mapping
Introduction
Provide a list of the services that are offered, for each one, how to call them and the structure of the response that is returned is also an essential feature for a Web API.
In this article, we will talk about Swagger.
Swagger tools takes the hard work out of generating and maintaining your API docs, ensuring your documentation stays up-to-date as your API evolves.
The Swagger framework for ASP.NET Core is an open source implementation based on the OpenAPI specification born in 2010.
Installation
Download this package:
PM> Install-Package Swashbuckle.AspNetCore -Version 4.0.1
Configuring Startup.cs
It’s pretty simple to configure and activate Swagger.
First let’s add Swagger in ConfigureServices method:
public void ConfigureServices(IServiceCollection services)
{
   services.AddSwaggerGen(c =>
   {
      c.SwaggerDoc("v1", new Info { Title = "My API + profiler integrated on top left page", Version = "v1" });
      c.AddSecurityDefinition("Bearer", new ApiKeyScheme
      {
         Description = "JWT Authorization header using the Bearer scheme. Example: \"Authorization: Bearer {token}\"",
         Name = "Authorization",
         In = "header",
         Type = "apiKey"
      });
      c.AddSecurityRequirement(new Dictionary<string, IEnumerable<string>>
      {
         { "Bearer", new string[] { } }
      });
   });
}
Adding the document needs only one line:
c.SwaggerDoc(“v1”, new Info { Title = “My API + profiler integrated on top left page”, Version = “v1” });
It defines only the version, and the title of the documentation.
The rest below is there only for enable Authorization with a bearer token. In this serie of article I’m using bearer token, so you can replicate everything I do in this serie if you follow the serie since the first article.
Now let’s activate the middleware that serves Swagger and the middleware that serves the Swagger UI:
// Enable middleware to serve generated Swagger as a JSON endpoint.
app.UseSwagger();

// Enable middleware to serve swagger-ui (HTML, JS, CSS, etc.),
app.UseSwaggerUI(c =>
{
   c.RoutePrefix = "api-doc";
   c.SwaggerEndpoint("/swagger/v1/swagger.json", "My API V1");
});
I added here a RoutePrefix named “api-doc” in order to build a friendly Url when you want to display the Swagger UI.
Demo
Now if we run the WebApi Swagger UI page, it should look like this:
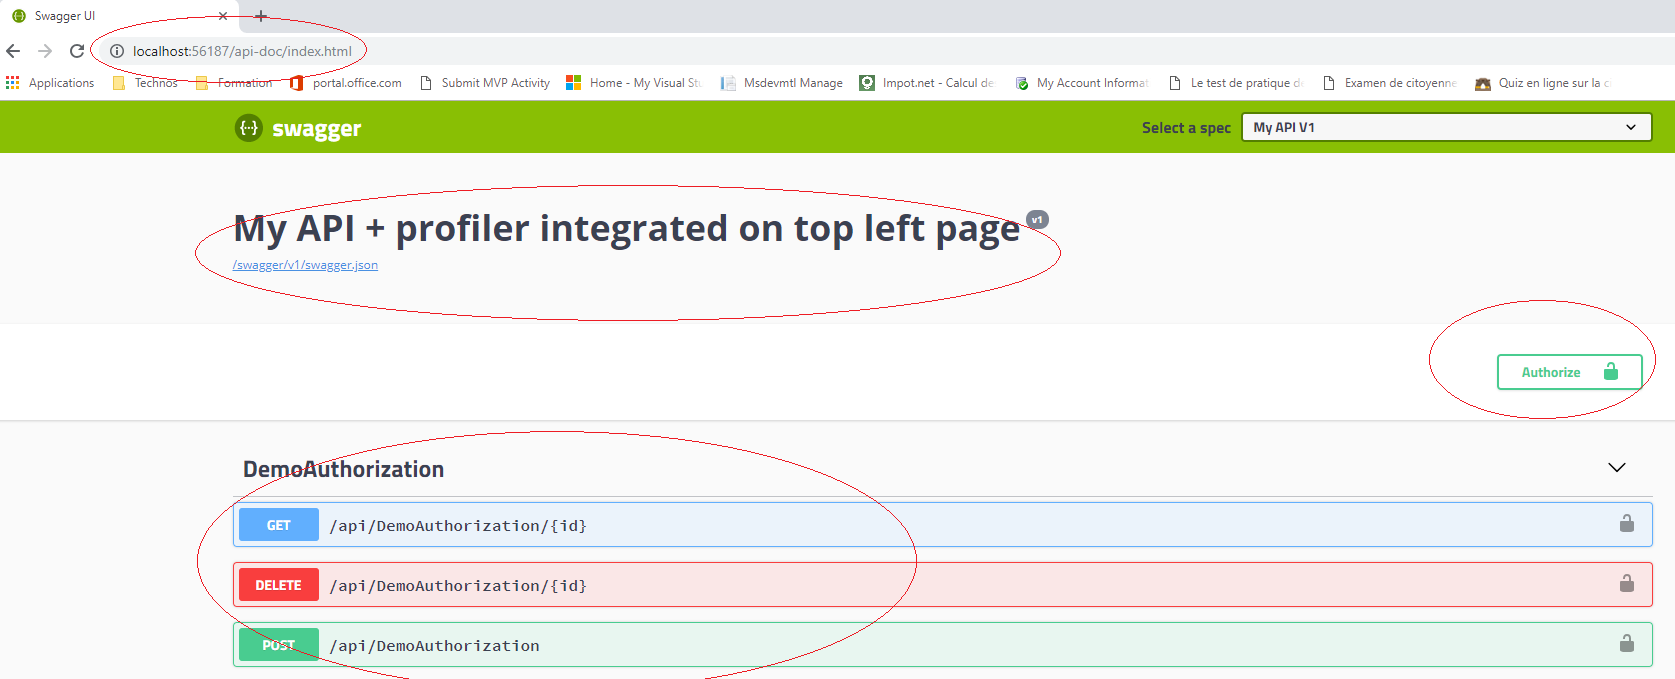
We have the title as we typed it ine the Startup configurations, our routes as documentation and the Authorize button.
Let’s try now to test a route with the Authorization, because our routes are protected with a Bearer Token.
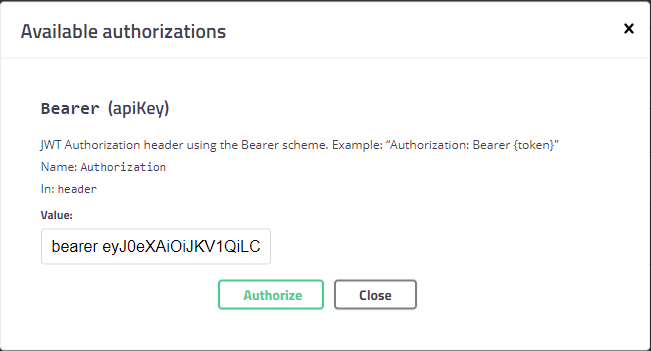
Set up the token value
Open the popup after clicking on the Authorize button and set up the value like this: bearer “Your token”:
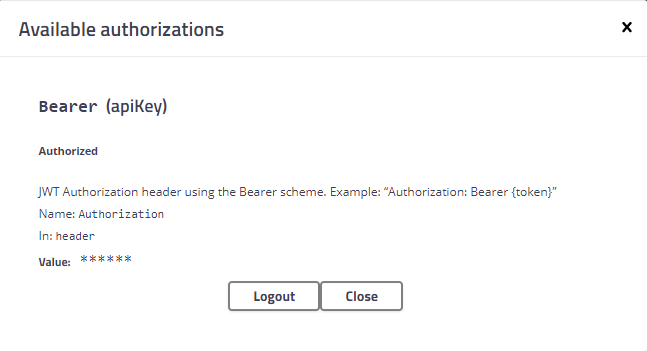
Then press Authorize button again in the popup:
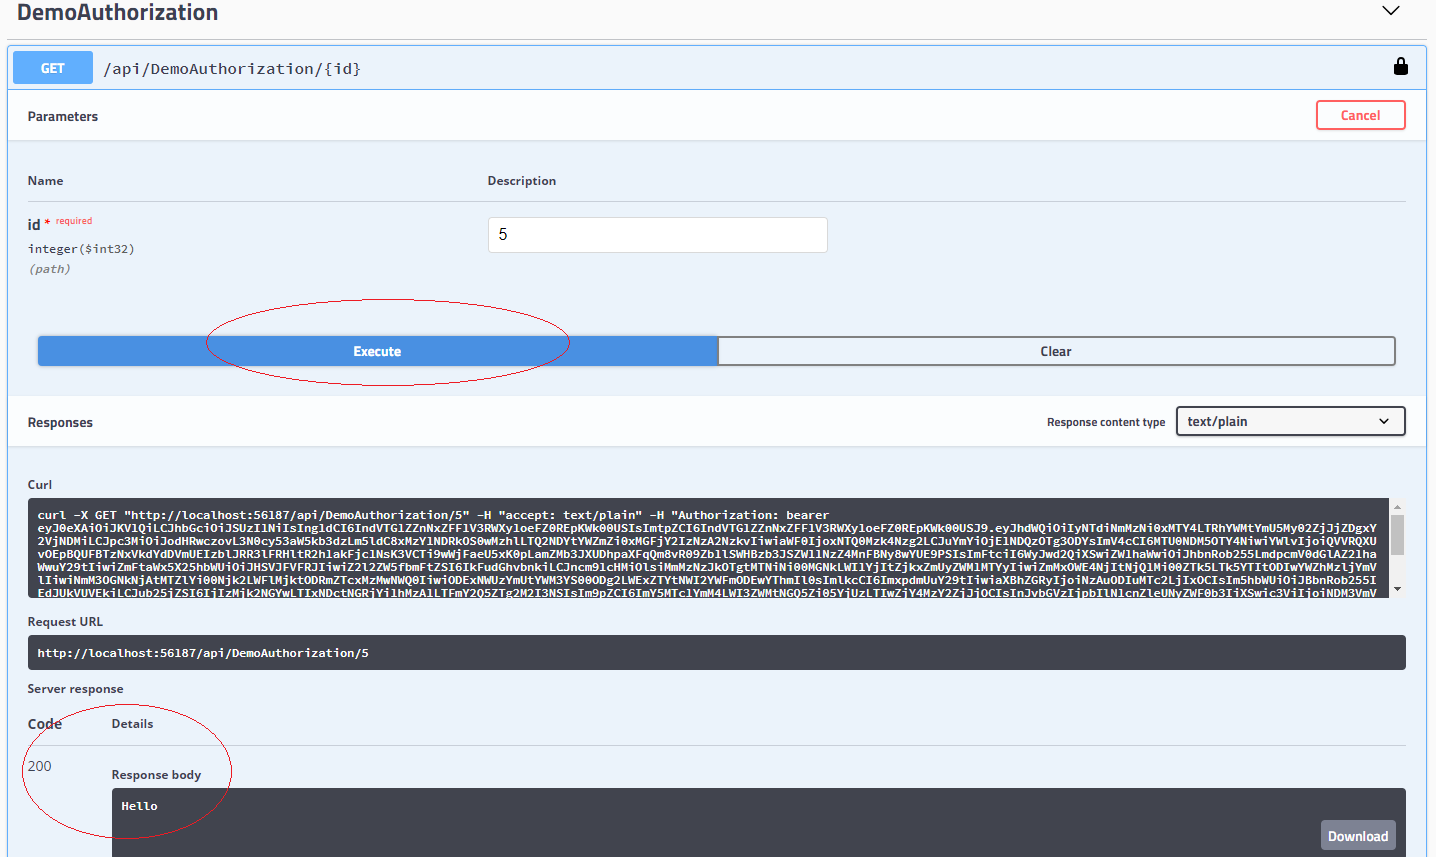
Calling the route
Like the picture below, the call should succeed:
Conclusion
You saw how to add easily documentation in your WebApi.
That’s a nice feature to have when you create a WebAPI.
I hope you will now have the reflex to add it to your WebApis 😉