Configuring Azure KeyVault in Asp.Net Core 2.2 and Azure
Introduction
Azure Key Vault is a service provided by Microsoft to securely manage the secrets, keys, and certificates of an application so that they are neither in the configuration values nor in the source code controller. Thus, it makes it possible to store passwords, chains of connections, sensitive data in complete safety.
In this article we will see how to configure Azure KeyVault in Azure and store there for example a connection string and configure an ASP.NET Web API.
Prerequisites
Before starting any configuration, you must first have created an application in the “App registration” section.
It must indeed allow the latter to access Azure Keyvault, we will see this a little further.
I already described in a previous article the creation of an application, this article is here:
http://anthonygiretti.com/2018/02/28/using-openidconnect-with-azure-ad-angular5-and-webapi-core-azure-ad-configuration/
Once the tutorial followed, just grab the clientId and clientSecret if the latter was not created, then create it. (see screenshot below).
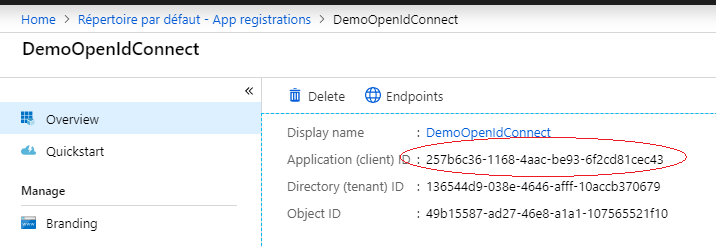
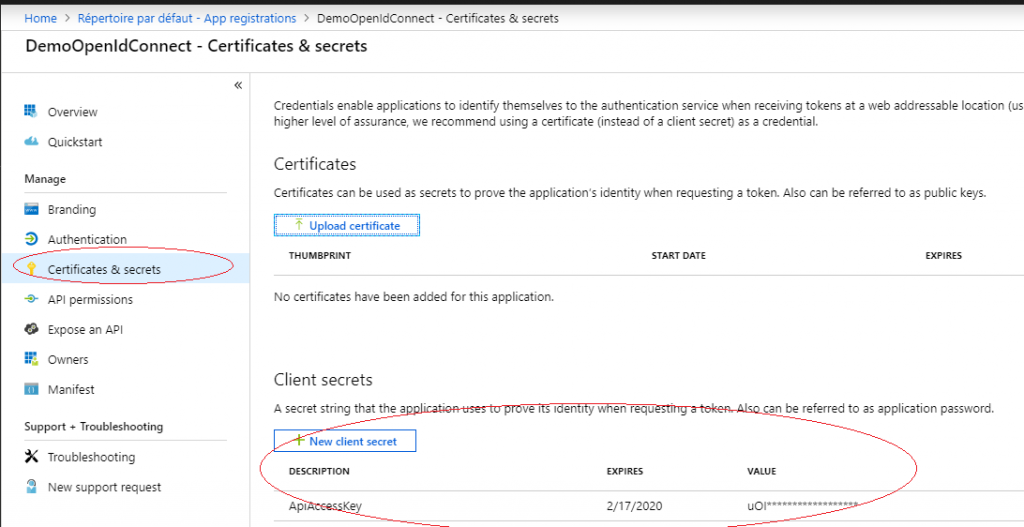
This key pair will be used to consume AzureKeyVault in our ASP.NET Core Web Application.
Creating and configuring an Azure KeyVault
We now have an application authorized to access KeyVault and we have its clientId and clientSecret.
So we can configure our Azure KeyVault
Step 1
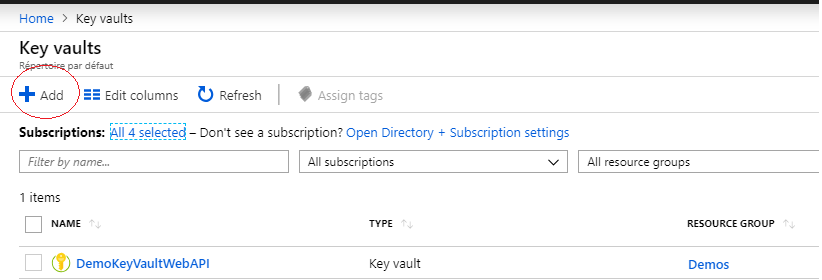
Go to Azure KeyVault section and click on “Add” button :
Step 2
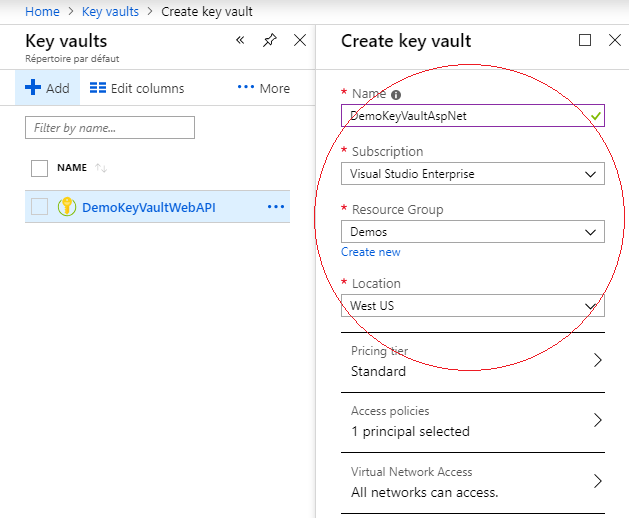
Enter the name, the subscription, the resource group and the location and click on “Create button” :
Step 3
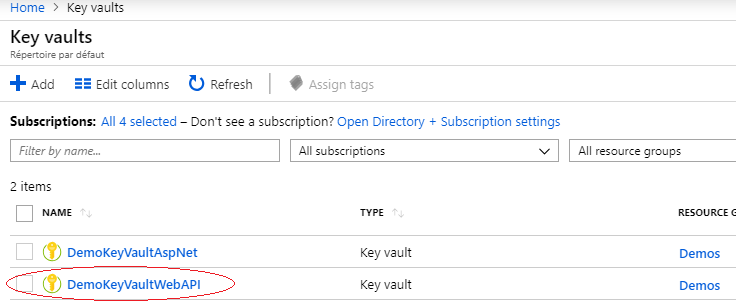
The KeyVault should be created:
Step 4
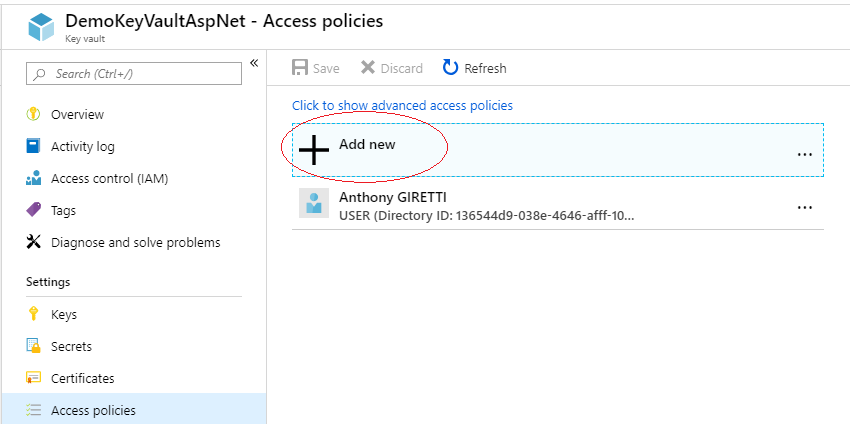
Click on the name of the newly created KeyVault and go to “access policies” section then click on “Add new”. We will add the application previously created in “App registrations” in Azure AD. This action will allow any .NET application that uses the clientId / clientSecret of this application to consume this Azure KeyVault.
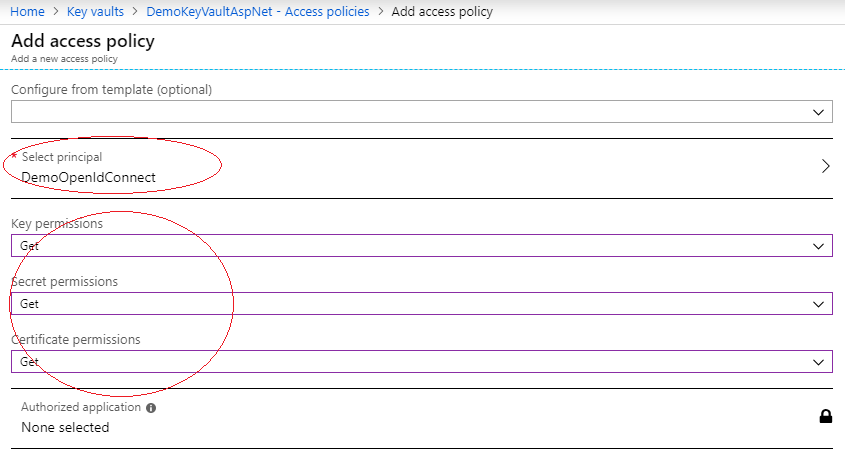
The section “Select principal is the place to add our application. Its name is “Demo Open Id Connect” in my case. Then select “Get” everywhere if your .NET application is just consuming Azure KeyVault.
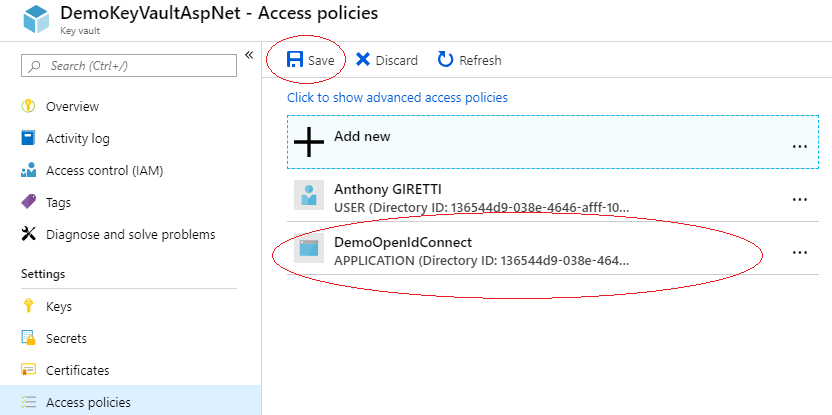
Once your done click on “Save”
Step 5
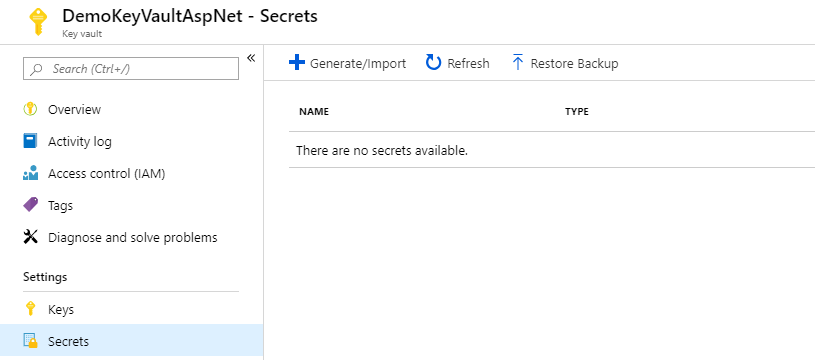
Now it’s time to create an item that we want to store in Azure KeyVault instead of the appsettings of our .NET application. To do this go to section “Secrets” of your newly created Azure KeyVault :
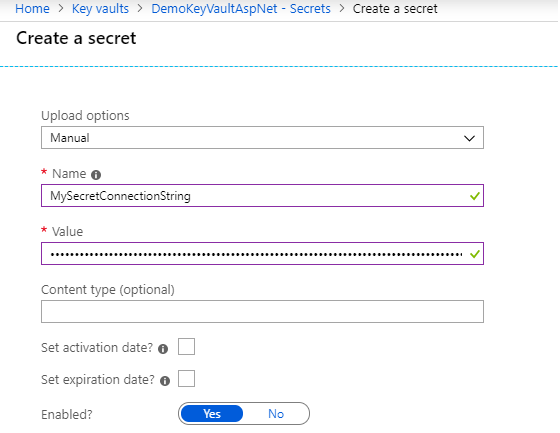
Let’s add a connection string for example, we need to set options to “manual”, the name and obviously the value. We won’t use activation dates (begin and start) we will just activate it until we deactivate it :
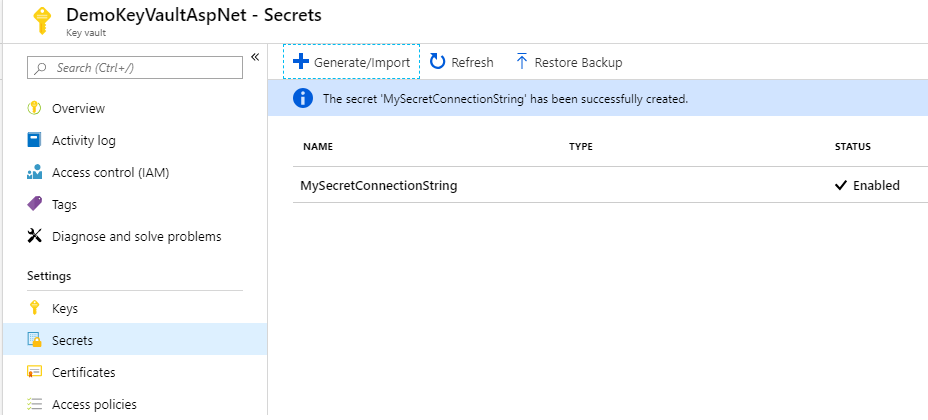
Once done the secret value will appear in the list of secrets (only the name) :
Configuring ASP.NET Core application with Azure KeyVault
ASP.NET side, it’s very simple we will install the necessary package nuget, configure access to KeyVaul in appsettings.json and write a few lines of code ….
Step 1
Just install this package:
PM> Install-Package Microsoft.Extensions.Configuration.AzureKeyVault
Step 2
Get your KeyVault name, your clientId and your clientSecret (of your WebApplication in Azure AD) and put them into the configuration file “appsettings.json”
Step 3
The last step is to add some lines of codes in your program.cs like this:
Demo!
By using IConfiguration interface, you can access your configuration as you would use configuration from appsettings.json, it’as absolutely seemless. You just have to use the name of your secret value you defined in yout Azure KeyVault like this :

Beautiful isn’t it? 😉
